How To Make a Magpie Nest
My favorite animal? Why the Magpie of course! The only creature whose affinity for collecting all things shiny that match my own. Over the years I have haphazardly gathered pretty ribbon and bobbles with no plan in place. Then it hit me one cold February day! Why not celebrate those trinkets by building my own Magpie’s nest in time for spring?

Creating your own bird’s nest can be as simple, or as elaborate as you want. For me it is an exercise of celebrating the perfection found within the imperfection, beauty amongst the chaos. I personally like to approach it with a loose treatment to achieve a more natural look, rather than tight which can appear manufactured. Momma birds construct their nests using snippets and bits containing an array of color and texture. So, when building a nest I make sure to use at least three different materials (ex: sticks, twine, moss, rattan, ribbon, etc.) to help replicate what a bird would do.
(Disclosure: I receive commission for purchases made using Amazon links in my article. I appreciate your support!)
Here are the tools and materials I used to create my Magpie nest:
- Twine
- Mod Podge
- Bowl
- Saran wrap
- Sticks from the yard
- Rattan
- Preserved Moss
- Glue gun (maybe)
- Shiny miscellaneous trinkets, ribbons, and crystals
Step #1 - Gather outdoor materials
Strong winds hit Maryland this winter, knocking down plenty of stick in the front yard.


Step #2 - Create a skeleton
Using a bowl that matches the nest size you want to make; you can create a twine skeleton that will provide a great foundation for your project. Be prepared... this process will take at least 1-2 days, and you will get Mod Podge on your hands (which is no biggie... but can get messy).
I love using twine for the skeleton because its color and texture appears so natural. You won't even see it once your project is complete.
First, place you bowl upside down, wrap it with Saran Wrap inside and out, brush the bottom of the bowl with Mod Podge, then loosely wrap the bottom of the bowl with twine. Repeat this step after the Mod Podge dries, then brush the final layer of twine with the Mod Podge to help adhere all the strands together.
If you twine doesn't want to behave and remain flush with the bowl's shape, simply cover it with Seran wrap and place an object on top of it while it dries. This day I grabbed a spool of copper wire to hold down stands that wanted to pop up.

Step #3 - Weave in sticks
Take your sterilized sticks and weave them through your dry twine skeleton. The sticks may have become brittle during the baking process, so use a gentle hand.


Step #4 - Wrap it with rattan
This step was much easier than I had anticipated! Take one bundle of rattan and pull it apart loosening the strands to make it appear 'wilder'. Then simply wrap the exterior of the nest with the rattan, weaving it in among the sticks which will help hold the shape.
I had truly anticipated having to use my glue gun to keep the rattan in check. However, the sticks took care of everything. Huzzah!


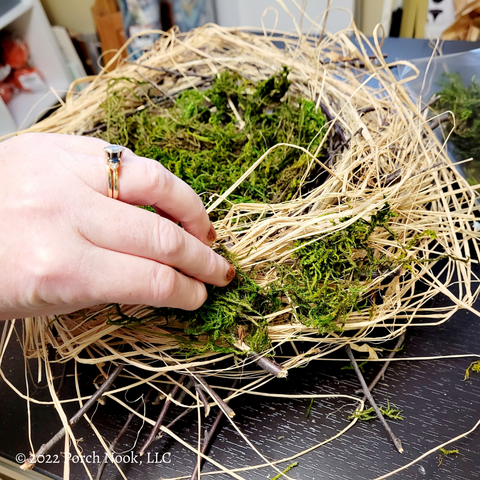
Step #5 - Add moss and other natural textures
Following my "three different materials" rule, I decided to add preserved moss to my nest. I love this stuff, especially during Easter... the decorating possibilities are endless!
Grab a clump of moss and add it to the center of your nest to create a soft, welcoming appearance. Then add little tufts of moss along the side within the rattan to create depth and visual interest.
Once again, I was surprised I didn't need my glue gun to keep the moss in place. There is no right or wrong way to do this. Just have fun following your instincts and watch it evolve naturally.
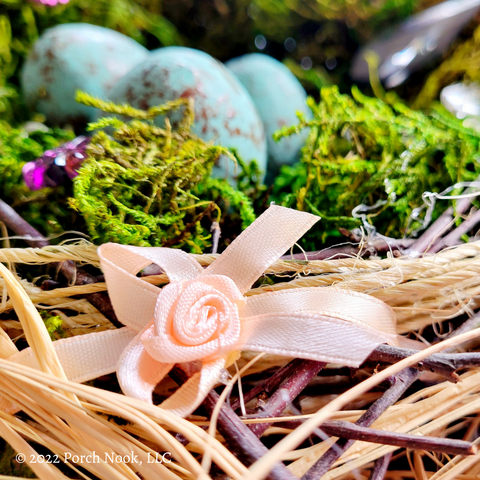
Step #6 - Add Magpie treasures
This final step was the most exciting for me because, finally, the shiny objects that have caught my eye over the years get their day to shine! Chandelier crystals, purple floral beads, a small pink ribbon once wrapped around a gift, and a shiny bookmark pendant led the way to my vision.
Remember, you can add anything to your nest! Use jewelry, dried flowers, anything that will bring you joy and sweet memories.


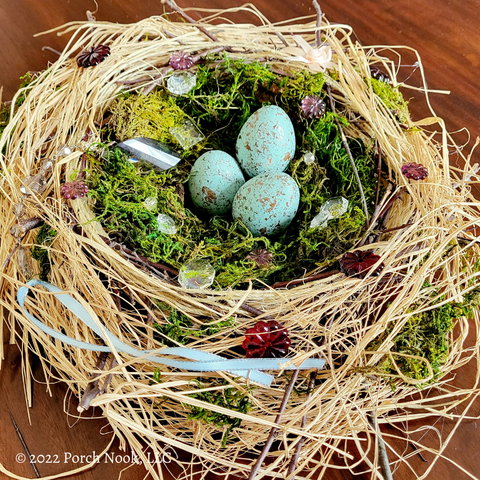
If you want to learn how I created the eggs, please read on...


To create the speckled pattern is an easy and quick step. Simply crumple up a sheet of tissue paper, then spray the paper with brown Krylon paint. Dab the paper mâché eggs with the tissue paper with a light touch and you will have yourself a perfect speckled egg!
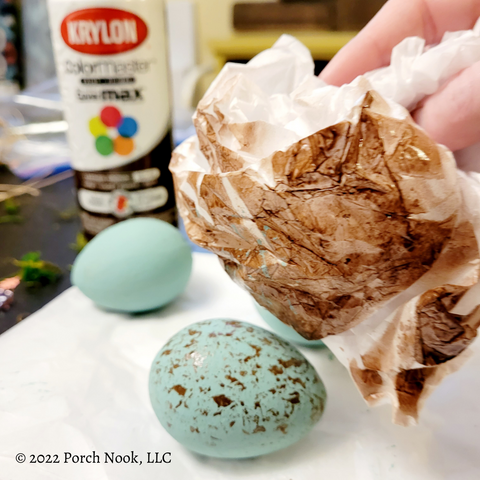

Voilà!
So, are you ready to embrace your inner Magpie? I hope this article will inspire you to create your own, or perhaps introduce this project as a fun new tradition in your household. Remember, it's all about celebrating the perfection found within the imperfection... as all things should be. XOXO
